
NetworkMap: Visual Connection Management Comes to Copiix Console
The NetworkMap in Copiix Console has been significantly upgraded. You can now enter a dedicated Connection Mode directly from the map, queue multiple additions or removals, and execute them all at once. A new visual language — built on colors and shapes — tells you exactly what each node is and what it can do, including which terminals have remote services enabled.
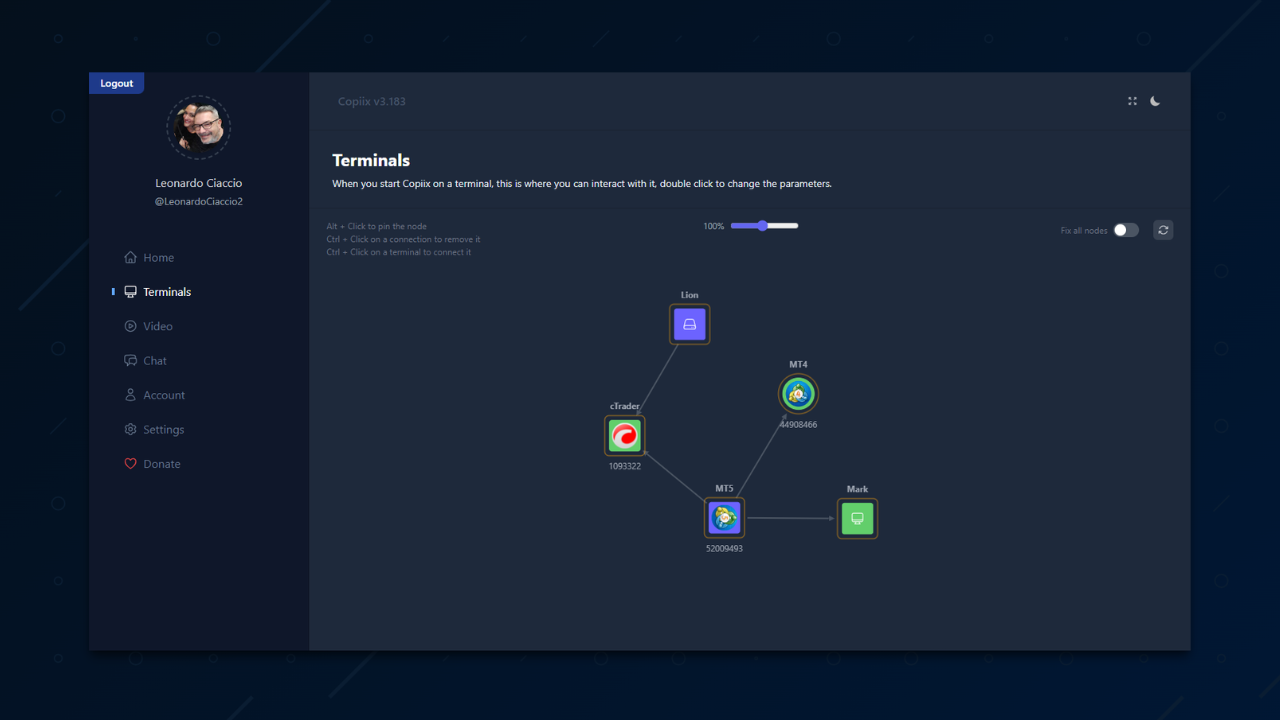
The NetworkMap has always been the best way to get a bird's-eye view of your copy trading setup. Now it does a lot more than just display — it lets you build and manage connections directly from the map, with a visual language that makes your entire setup readable at a glance.
This post walks you through everything: what the colors and shapes mean, how Connection Mode works, what the batch queue does, and how remote services fit into the picture.
The Visual Language: Colors and Shapes
Before you touch anything, the map is already telling you a story. Every node has a color and a shape, and both carry meaning.
Colors
| Color | What it means |
|---|---|
| 🟣 Purple | This terminal is a provider — it sends trades to others |
| 🟢 Green | This terminal is a copier — it receives and replicates trades |
| 🟡 Yellow | This terminal is both — it provides trades and copies from another source at the same time |
| ⚫ Grey | Standard terminal with no provider or copier role assigned |
These colors follow the same logic used throughout the Console. If you already know your way around the terminal settings page, the map will feel immediately familiar.
Shapes
| Shape | What it means |
|---|---|
| ⚪ Circle | A standard local terminal |
| 🟦 Square with logo | A local terminal with remote services enabled |
| 🟦 Square with server icon | A Remote Provider (rp_) — another Copiix user sharing their trades with you |
| 🟦 Square with monitor icon | A Remote Copier (rc_) — another Copiix user receiving trades from you |
The shape distinction is where it gets interesting. Circles are your everyday local terminals. When a terminal has remote capabilities enabled — specifically, when it is configured as a remote provider or a remote copier — it becomes a square. It still shows its platform logo (MT4, MT5, or cTrader) inside, so you can identify it at a glance, but the square shape immediately signals: this node participates in remote connections.
Remote nodes (rp_ and rc_) are always squares, displayed with a solid background and a dedicated icon rather than a logo. This keeps them visually distinct from your local terminals even when they share the same shape.
Connection Mode
Connection Mode is how you build new connections directly from the map without leaving the view.
Entering Connection Mode
Ctrl + click on any provider node — that's a purple, yellow, or rp_ square. The moment you do, the map shifts:
- The node you clicked gets a dashed indigo halo — this is your active source
- Every node that can receive a connection from this source lights up at full opacity
- Everything else fades to 15% opacity
This dimming is intentional. It filters out the noise and shows you exactly what's connectable from where you are. No guessing, no trial and error.
What Lights Up
What lights up depends on your source node:
- Local provider (purple/yellow circle or square): local copier terminals light up, and if this terminal has remote provider services enabled, remote copier nodes (rc_) light up too
- Remote provider (rp_): only local terminals configured as remote copiers light up
Nodes that are already connected don't light up — the map won't suggest connections that already exist.
Adding Connections
Click any lit-up node to queue it for addition. When you do:
- A solid green halo replaces the dashed one — this node is now in the batch queue
- The source node stays active, so you can keep clicking more targets
- Click a queued node again to remove it from the queue (toggle behavior)
You can queue as many connections as you want in a single session. The map stays in Connection Mode until you explicitly exit it.
Executing the Queue
When you're ready, an Execute button appears at the bottom right of the map showing the number of pending operations. Click it to apply everything at once — all additions and removals are committed to Firebase in a single coordinated operation.
This batch approach means you can restructure an entire group of connections without triggering a save on every single click. Plan first, execute once.
Exiting Connection Mode
You can exit at any time:
- Ctrl + click the same source node — exits without executing
- Click an invalid target — exits immediately
- Press ESC — exits and clears all pending operations (additions and removals)
- Click Execute — exits after committing everything
Removing Connections
Removal works the same way as addition, but in reverse. Alt + click on an edge (the line between two nodes) queues it for removal. The edge turns red and gets added to the same pending queue. When you hit Execute, removals and additions are processed together.
Remote Services and the Square Shape
Remote services deserve a dedicated explanation because they change what a terminal can do on the map.
Remote Provider
A local terminal with Remote Provider enabled can send its trades to users on other Copiix accounts — represented by rc_ nodes on your map. On the map, this terminal becomes a square with its logo inside, indicating it has cross-account reach.
When you enter Connection Mode from this terminal, rc_ nodes (remote copiers) light up alongside local copiers. You can queue connections to them exactly like local ones.
Remote Copier
A local terminal with Remote Copier enabled can receive trades from users on other Copiix accounts — represented by rp_ nodes. This terminal also becomes a square on the map.
When an rp_ node enters Connection Mode, only terminals with Remote Copier enabled light up as valid targets.
Why the Shape Change Matters
The square shape is your instant visual signal that a terminal is participating in remote connections — either sending or receiving across accounts. You don't need to open settings to know this. One look at the map and you know exactly which terminals have extended reach and which don't.
Putting It All Together: A Practical Example
Say you have three local terminals:
- Terminal A — Purple circle. It's a provider, no remote services.
- Terminal B — Yellow square. It's both a provider and a copier, with Remote Provider enabled.
- Terminal C — Green circle. It's a copier only.
And on the remote side, you have one rc_ node — a remote copier belonging to another Copiix user.
Scenario 1: You Ctrl+click Terminal A. Terminals with copier role light up — Terminal C does. The rc_ node stays dim because Terminal A doesn't have Remote Provider enabled.
Scenario 2: You Ctrl+click Terminal B. Terminal C lights up (local copier), and the rc_ node also lights up (remote copier, reachable because Terminal B has Remote Provider enabled). You click both. Two green halos appear. You hit Execute. Both connections go through in one shot.
Scenario 3: You want to rewire everything. You Alt+click three edges to queue removals, then Ctrl+click Terminal B and queue two new additions. Execute runs all five operations together.
The Execute Button
The Execute button is more than a convenience. It's a design decision: the map doesn't save anything until you ask it to. This means you can experiment freely — add, remove, reconsider — and nothing touches your live setup until you commit. If you change your mind entirely, just press ESC and the queue is gone.
The button shows the total count of pending operations so you always know how much is about to change before you pull the trigger.
Quick Reference
| Action | How |
|---|---|
| Enter Connection Mode | Ctrl + click on a provider node |
| Queue a connection | Click a lit-up target node |
| Dequeue a connection | Click the queued target again |
| Queue a removal | Alt + click on an edge |
| Execute all pending | Click the Execute button (bottom right) |
| Exit without executing | ESC, or click an invalid target |
| Change source mid-session | Ctrl + click another provider node |
The NetworkMap is now the fastest way to understand and change your copy trading topology. The color and shape system removes ambiguity, Connection Mode removes friction, and the batch queue removes mistakes. It's all there, in one view.